How to set up cronjob for osTicket
When extracting osTicket installation package, you will see two folders including upload (which you upload to your server to install osTicket), and scripts (which contains various scripts).
When you completed setting up your osTicket, open the file rcron.php in the scripts folder, then update line 24 and 25 as below:
'url'=>'http://yourdomain.com/support/api/tasks/cron',
'key'=>'API KEY HERE'
Replace http://yourdomain.com/support with your URL to your osTicket homepage, and API KEY HERE with the generated API key.
To generate API key, login to your osTicket agent dashboard, visit Admin Panel > Manage > API Key, click Add New API Key, enter your web server's IP address into IP Address, check the box Can Create Tickets and Can Execute Cron, then click Add Key.
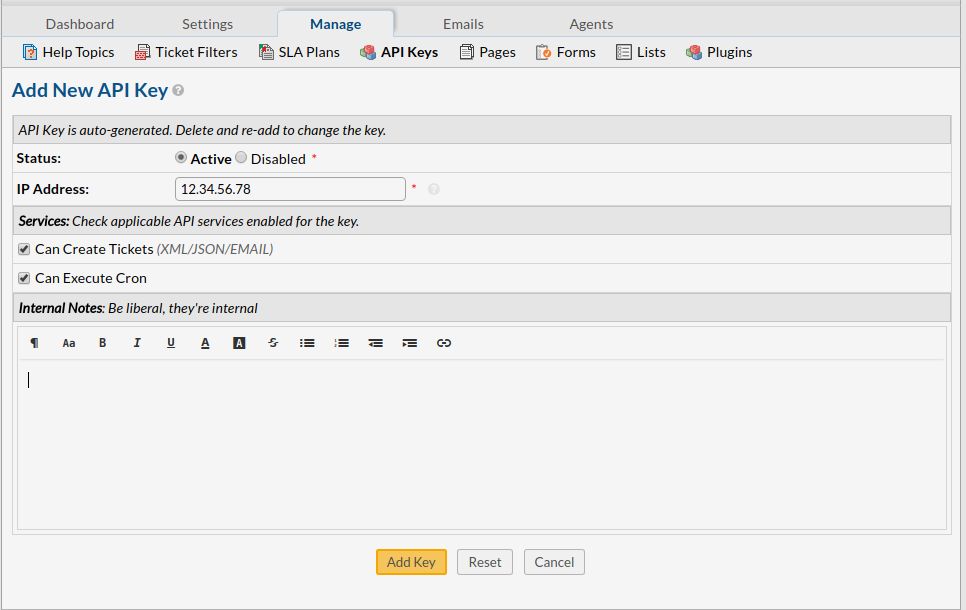
After that, you will get the generated API Key.
Upload the file rcron.php to the same directory of your osTicket installation, so it can be accessed at
https://yourdomain.com/support/rcron.php
Once you're done, you can set up cronjob with the URL above. When creating cronjob, just enter the URL, and select When to call: Every 2 minutes, and Save.
Need help? Reach out to support@fastcron.com - we're happy to help.